Showing posts with label birthday. Show all posts

Saturday, 30 December 2017

Oi Frog! cake

"Oi FROG! Sit on a log!" said the cat. "But I don't want to sit on a log," said the frog. "Logs are all knobbly and uncomfortable and they can give you splinters in your bottom". 

Oi frog birthday cake

So opens my little boy's favourite book - it may be his favourite possession in the world. I've lost count of how many times he's brought it to me to read just this morning. When it came to his first birthday I wanted to make him a very personal cake - something that he'd recognise and may understand was for him and we couldn't think of anything he'd enjoy more than an "Oi Frog!" cake.

Unfortunately my son has allergies to dairy and eggs. It's not really been that much of a problem whilst he's so little. He doesn't know he's missing out and we'd obviously rather he generally didn't cake anyway. But for his birthday he deserved a treat and so I needed to learn how to make a cake suitable for his allergies.

It took a lot of practice. Vegan cake just doesn't behave like I'm used to from many years of making traditional cakes. I was aiming for a chocolate cake as I expected the extra flavour may mask the fact the butter and eggs were missing. I started with a copy of 'Ms Cupcake "The naughtiest vegan cakes in town"' and developed on their recipe for chocolate peanut butter cupcakes (did I mention that he has a peanut allergy too...).

With regular cake it's basically the same recipe for cupcakes and full size cakes. I learned the hard way that there's a reason this book has different recipes for cupcakes and cakes. When I used the cupcake batter in a 8" cake tin it burned at the edges whilst it was still raw in the middle. I tried using the cake recipe in the 8" tin and that baked ok but it wasn't as light and tasty as the cupcakes had been. Probably all just my inexperience.

In the end this is what worked for me:

Wet ingredients:

200ml soya milk
20ml cider vinegar
80ml rapeseed oil
1tsp vanilla extract
50g smooth hazelnut butter

Dry ingredients:

170g self raising flour
200g caster sugar
30g cocoa powder
1/4 tsp salt
1/4 tsp bicarbonate of soda
1/4 tsp baking powder

Preheat the oven to 180 c. Grease and flour a log tin such as this one.

Add the vinegar to the soya milk and leave to stand for 10 minutes.

After 10  minutes add the rest of the wet ingredients to the soya milk mixture and mix really well so the hazelnut butter is fully combined.

In a separate bowl sieve all the dry ingredients together and mix really well so everything is combined.

Now working quickly because as soon as the vinegar hits the raising agents the magic chemistry will start to happen, add the wet to the dry ingredients and mix for no more than 10 seconds. A few lumps are fine. Pour into the greased tin. Give it hard tap on the work surface to pop any bubbles then put it straight in the oven for 30 minutes or until a skewer inserted into the middle comes out clean.


I'd struggled to picture how to bring the frog to life in a 3D model when I found a fantastic example from Vanilla Frost Cakes. Massive kudos to them for the inspiration here.

I added Tylo powder and green and yellow food colouring to some supermarket sugarpaste and sculpted it into the frog's body. I then added extra food colouring to a little paste and made the spots which were stuck on with edible glue made from Tylo. The limbs were extruded through one of these nifty devices. I'm particularly proud of the writing which was done using some edible white tint powder mixed with a little neat alcohol to make a paint that would dry very quickly and give the chalky effect.


Thanks to Kes Gray and Jim Field for creating this book that our little boy loves. Euan had a lovely birthday and really enjoyed his surprisingly tasty cake.

Oi Frog book cover

Monday, 13 June 2016

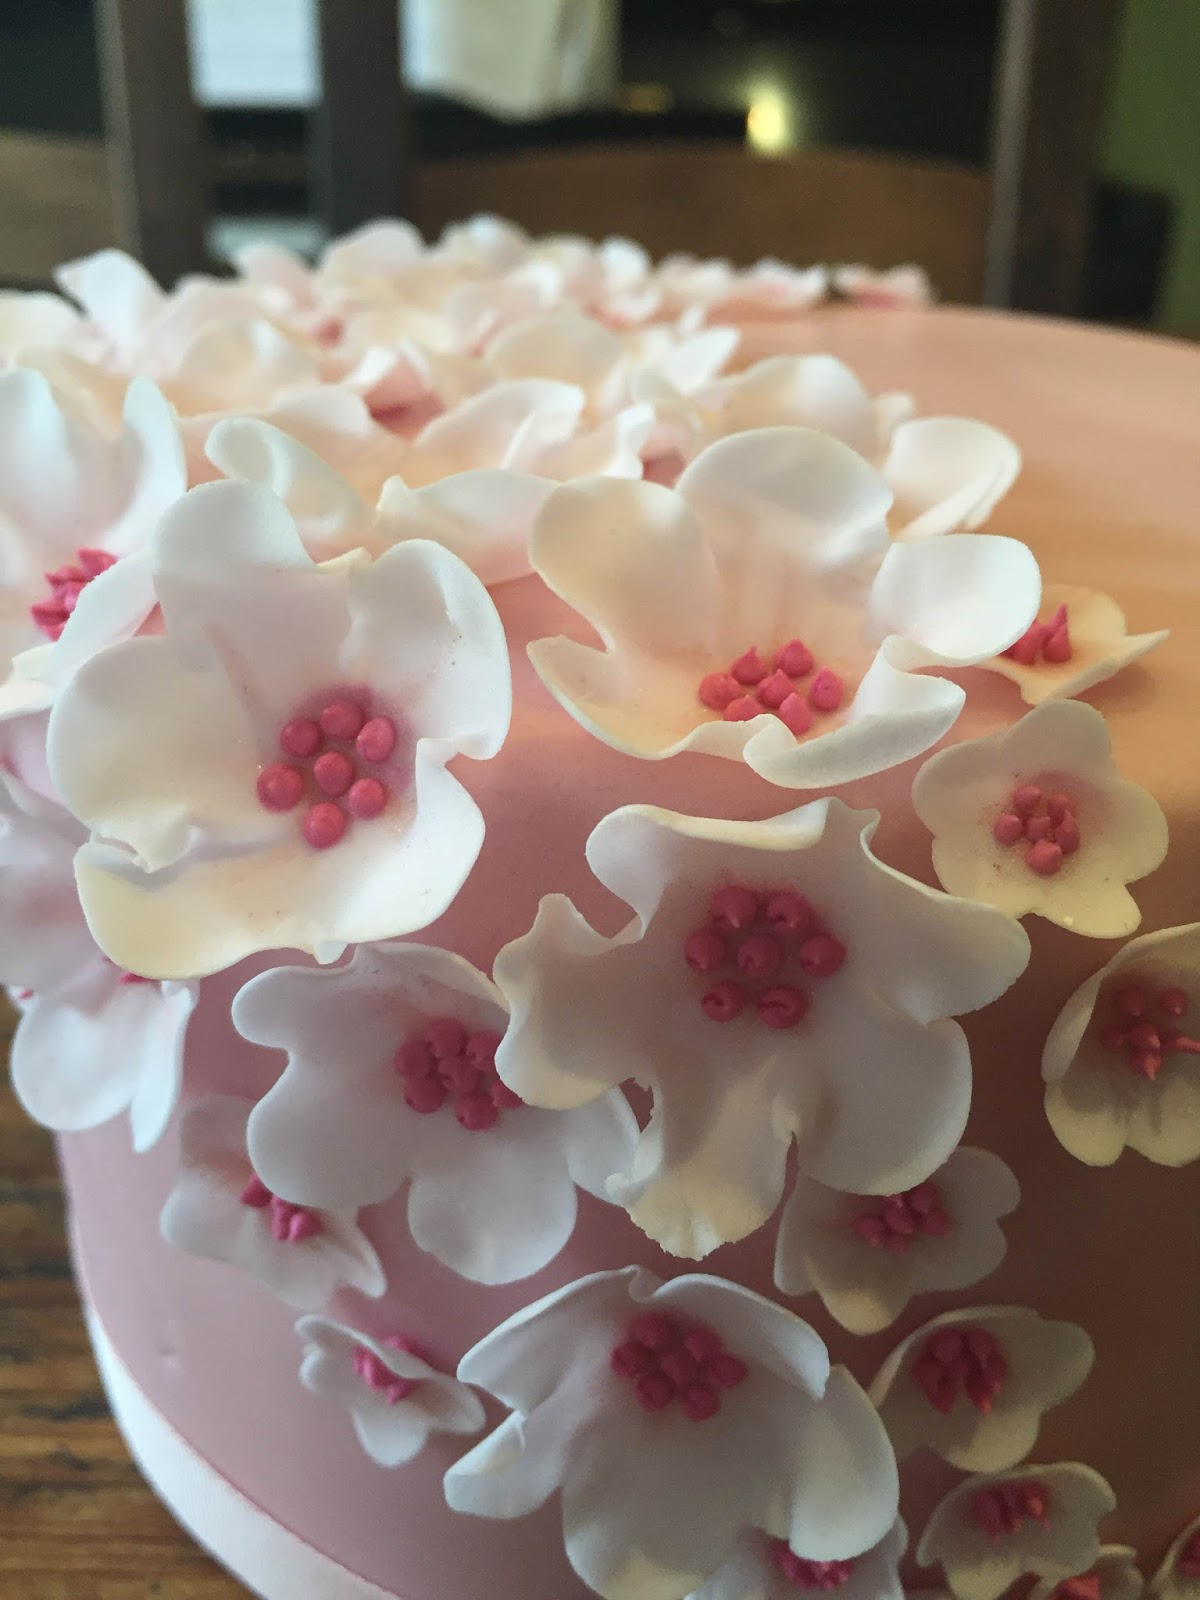
Japanese Cherry Blossom cake

Japanese cherry blossom cake

I'm a big fan of so many things about Japanese culture and one of my favourites is the idea of a 'hanami' party to welcome spring and celebrate the blossoming of the trees. Cherry blossom (sakura) and plum blossom (ume) are just so pretty! I really hope to visit Japan in the spring and enjoy a hanami party and drink sake under the blossoms some day. Until then you may find me in the garden in spring having a wee sake by my very own cherry tree...

I wanted to bake a Japanese themed cake for my friend Steph who spent six months working in Japan and was lucky enough to partake in the hanami festivities. I've previously made the below blossom cake for my cake decorating certificate. This time I wanted to make something with more impressive flowers using sugar florist paste.

Japanese blossom tree icingCake with model of Japanese lady in kimono made of sugarpaste

The design is very much based on the fondant fancies in from Peggy Porschen's Cake Chic. Given how much I love blossoms I'm not sure why I've not made this before!

It's a normal 6" cake decorated with pink fondant. You can see my other blog posts here with instructions on how to bake and decorate the basic cake.

It's been quite warm and humid this week which complicated things. The buttercream was very runny and struggled to be whipped so I had to refrigerate it to firm it up. The heat also made the marzipan and icing extra pliable and easy to stretch and tear so I may resort to lightly chilling them the next time I bake in summer. I'll certainly be allowing extra time when baking when it's warm in future.

How to make japanese cherry blossoms from sugar florists paste using a sponge and ball or boning tool

The petals are made from sugar florist paste. This is an icing with added gums that mean it can be worked very, very thinly. I first rolled the paste and used a blossom cutter to cut out the simple flower shape. I then placed the blossom on a cake decorating sponge and gently thinned further using a ball tool. The tool should be rubbed over the flower evenly until it is consistently very thin and almost see-through. Finally to really flute the edges I rubbed the tool with a fairly firm pressure just over the edge. I left the flowers to shape and dry in an an artists palette that had been dusted with corn flour to prevent it sticking.

Blossoms made from sugar florists pastes drying in an artists palletDusting sugar florist paste flowers

Once dry the next stage was to give the flowers a light dusting in the centre with some dusting powder. I used a tiny brush and a small drop of claret dust which I'd lightened with some white dust for a more subtle finish.

I then made and coloured pink some royal icing which I added to a small piping bag with a tiny 'no 1' piping nozzle. I piped tiny dots of royal icing in the centre for the stamen.

Handmade sugar cherry blossom

I then piped a larger dot to the back of each flower and used that to attach the flowers to the cake. 


Sunday, 5 January 2014

Tiffany Pearls Cake

Two tier Tiffany Pearls cake

I've been meaning to make this cake for ages but it's a complex one so I needed a really good reason to bake it. This week was my dear Mum's birthday so I thought it would be the perfect occasion.

The cake is based on this Peggy Porschen design from her Cake Chic book. Peggy's version is a Wedgewood blue but I've done it, more properly in my opinion, in Tiffany green by mixing some Holly Green and a touch of Navy food colouring into sugarpaste.

I wanted an impressive cake with a 7" and 5" tier but I couldn't find any 5" tins on my local high street. Any bigger would have been far too much cake for our small family party so I had to settle for 6" and 4" tiers.

Bottom tier cake with supports
A two-tier cake really needs support to stop the top-tier sinking into the bottom one. You can buy special supports for this but I already had some cake-pop sticks which I just cut down to the right height. The sticks are meant to sit about one millimetre above the top of the icing. The board for the top-tier should sit on the supports and not the cake below so as not to squash the cake and make sure the structure is stable.


I'm massively out of the habit of decorating with royal icing so I'm quite pleased with how well this has come out. I did a practice version completely free hand and learned that I just don't have the skills to do that! On the real cake, as recommended by Peggy, I scratched a straight line into the top tier and used that as a guide line. For the bottom tier I hand drew some swathes onto a piece of paper that I then traced onto the cake and used that as a guide line. After piping on the pearls I left them to dry and then painted then with edible lustre to give them the pretty pearlised sheen.


Friday, 3 January 2014

Nanna's Birthday Cake

Royal icing piped flowers cake


This is a cake I iced a few years ago for my Nanna's birthday. I was studying cake decorating at an evening class at the time and was keen to practice my skills with royal icing and this was certainly a big test! The design is from Peggy Porschen's Pretty Party Cakes book.

I made the flowers well in advance as they keep indefinitely. The pink flowers were the simplest to make. I used a petal nozzle to pipe a single petal onto the flower nail using a stiff peak royal icing, I then rotated the nail by 1/5th and piped another petal and so on. After the flower dried the yellow centres were then piped on top. The other flowers are all variations on the same theme. I particularly liked the violets which had two different colours of icing and used a black edible pen to accent the petals. After the cake was decorated the flowers were stuck down with more royal icing and pretty green leaves piped on randomly for added effect.

Royal icing piped flowers cake