Showing posts with label decorating. Show all posts

Saturday, 30 December 2017

Oi Frog! cake

"Oi FROG! Sit on a log!" said the cat. "But I don't want to sit on a log," said the frog. "Logs are all knobbly and uncomfortable and they can give you splinters in your bottom". 

Oi frog birthday cake

So opens my little boy's favourite book - it may be his favourite possession in the world. I've lost count of how many times he's brought it to me to read just this morning. When it came to his first birthday I wanted to make him a very personal cake - something that he'd recognise and may understand was for him and we couldn't think of anything he'd enjoy more than an "Oi Frog!" cake.

Unfortunately my son has allergies to dairy and eggs. It's not really been that much of a problem whilst he's so little. He doesn't know he's missing out and we'd obviously rather he generally didn't cake anyway. But for his birthday he deserved a treat and so I needed to learn how to make a cake suitable for his allergies.

It took a lot of practice. Vegan cake just doesn't behave like I'm used to from many years of making traditional cakes. I was aiming for a chocolate cake as I expected the extra flavour may mask the fact the butter and eggs were missing. I started with a copy of 'Ms Cupcake "The naughtiest vegan cakes in town"' and developed on their recipe for chocolate peanut butter cupcakes (did I mention that he has a peanut allergy too...).

With regular cake it's basically the same recipe for cupcakes and full size cakes. I learned the hard way that there's a reason this book has different recipes for cupcakes and cakes. When I used the cupcake batter in a 8" cake tin it burned at the edges whilst it was still raw in the middle. I tried using the cake recipe in the 8" tin and that baked ok but it wasn't as light and tasty as the cupcakes had been. Probably all just my inexperience.

In the end this is what worked for me:

Wet ingredients:

200ml soya milk
20ml cider vinegar
80ml rapeseed oil
1tsp vanilla extract
50g smooth hazelnut butter

Dry ingredients:

170g self raising flour
200g caster sugar
30g cocoa powder
1/4 tsp salt
1/4 tsp bicarbonate of soda
1/4 tsp baking powder

Preheat the oven to 180 c. Grease and flour a log tin such as this one.

Add the vinegar to the soya milk and leave to stand for 10 minutes.

After 10  minutes add the rest of the wet ingredients to the soya milk mixture and mix really well so the hazelnut butter is fully combined.

In a separate bowl sieve all the dry ingredients together and mix really well so everything is combined.

Now working quickly because as soon as the vinegar hits the raising agents the magic chemistry will start to happen, add the wet to the dry ingredients and mix for no more than 10 seconds. A few lumps are fine. Pour into the greased tin. Give it hard tap on the work surface to pop any bubbles then put it straight in the oven for 30 minutes or until a skewer inserted into the middle comes out clean.


I'd struggled to picture how to bring the frog to life in a 3D model when I found a fantastic example from Vanilla Frost Cakes. Massive kudos to them for the inspiration here.

I added Tylo powder and green and yellow food colouring to some supermarket sugarpaste and sculpted it into the frog's body. I then added extra food colouring to a little paste and made the spots which were stuck on with edible glue made from Tylo. The limbs were extruded through one of these nifty devices. I'm particularly proud of the writing which was done using some edible white tint powder mixed with a little neat alcohol to make a paint that would dry very quickly and give the chalky effect.


Thanks to Kes Gray and Jim Field for creating this book that our little boy loves. Euan had a lovely birthday and really enjoyed his surprisingly tasty cake.

Oi Frog book cover

Monday, 1 August 2016

King of the Mountain Cycling Jersey Cake

King of the mountains cycling jersey cake

My dad's favourite hobby is cycling, and when it came time to make a cake for his birthday we knew that it needed to have a cycling theme. I've unsuccessfully tried to make bicycles from sugar before so quickly ruled out designs that needed any kind of bicycle. In the end I settled on this more achievable jersey\t-shirt shape.

This cake was very much a family affair - made in collaboration with my mum with even some decorating assistance from my husband. We settled on the template style from this blog which seemed to both minimise the amount of off-cut wastage and also involved joining few pieces so the cake would still have some structure.

The left image below shows the template and how the jersey can be cut from a 12" x 10" cake - the largest we could make in a 12" adjustable cake tin. The right image shows the proportions on a 14" cake board.

King of the mountains cycling jersey cakeKing of the mountains cycling jersey cake

Mum baked the two massive sponges and soaked them with syrup before allowing them to firm up in the fridge overnight. This step was really important given the cakes were to be carved. They needed to be cooled properly or would have been be too crumbly. The next day she sliced the cakes into layers and filled them with jam and buttercream. Mum then cut around the template and rounded and softened the edges to make a less angular shape and finally coated with a generous layer of buttercream.

I decorated the cake whilst Mum got on with preparing the rest of the food for the family barbecue.

As usual I covered with a layer of marzipan then a layer of sugarpaste. As the shape was weird this didn't go around the arms smoothly but with a bit of trimming, coaxing and polishing then it eventually looked good.

I've struggled in the past to make really deep black or red icing so to keep things simple I bought Squires Kitchen ready coloured icing from the supermarket. I added some Tylo powder to the coloured icing so that it could be rolled really thinly. For the black decoration I simply wrote out 'DAD 50' in a word processor and printed that out. I used scissors to cut out the letters as templates that I placed on the icing to cut around with a knife. The circles were cut using a round cutter. After cutting I left the shapes to dry for 10 minutes to firm up before transferring to the cake and sticking down with edible glue made from more Tylo.

King of the mountains cycling jersey cake

King of the mountains cycling jersey cake


Monday, 13 June 2016

Japanese Cherry Blossom cake

Japanese cherry blossom cake

I'm a big fan of so many things about Japanese culture and one of my favourites is the idea of a 'hanami' party to welcome spring and celebrate the blossoming of the trees. Cherry blossom (sakura) and plum blossom (ume) are just so pretty! I really hope to visit Japan in the spring and enjoy a hanami party and drink sake under the blossoms some day. Until then you may find me in the garden in spring having a wee sake by my very own cherry tree...

I wanted to bake a Japanese themed cake for my friend Steph who spent six months working in Japan and was lucky enough to partake in the hanami festivities. I've previously made the below blossom cake for my cake decorating certificate. This time I wanted to make something with more impressive flowers using sugar florist paste.

Japanese blossom tree icingCake with model of Japanese lady in kimono made of sugarpaste

The design is very much based on the fondant fancies in from Peggy Porschen's Cake Chic. Given how much I love blossoms I'm not sure why I've not made this before!

It's a normal 6" cake decorated with pink fondant. You can see my other blog posts here with instructions on how to bake and decorate the basic cake.

It's been quite warm and humid this week which complicated things. The buttercream was very runny and struggled to be whipped so I had to refrigerate it to firm it up. The heat also made the marzipan and icing extra pliable and easy to stretch and tear so I may resort to lightly chilling them the next time I bake in summer. I'll certainly be allowing extra time when baking when it's warm in future.

How to make japanese cherry blossoms from sugar florists paste using a sponge and ball or boning tool

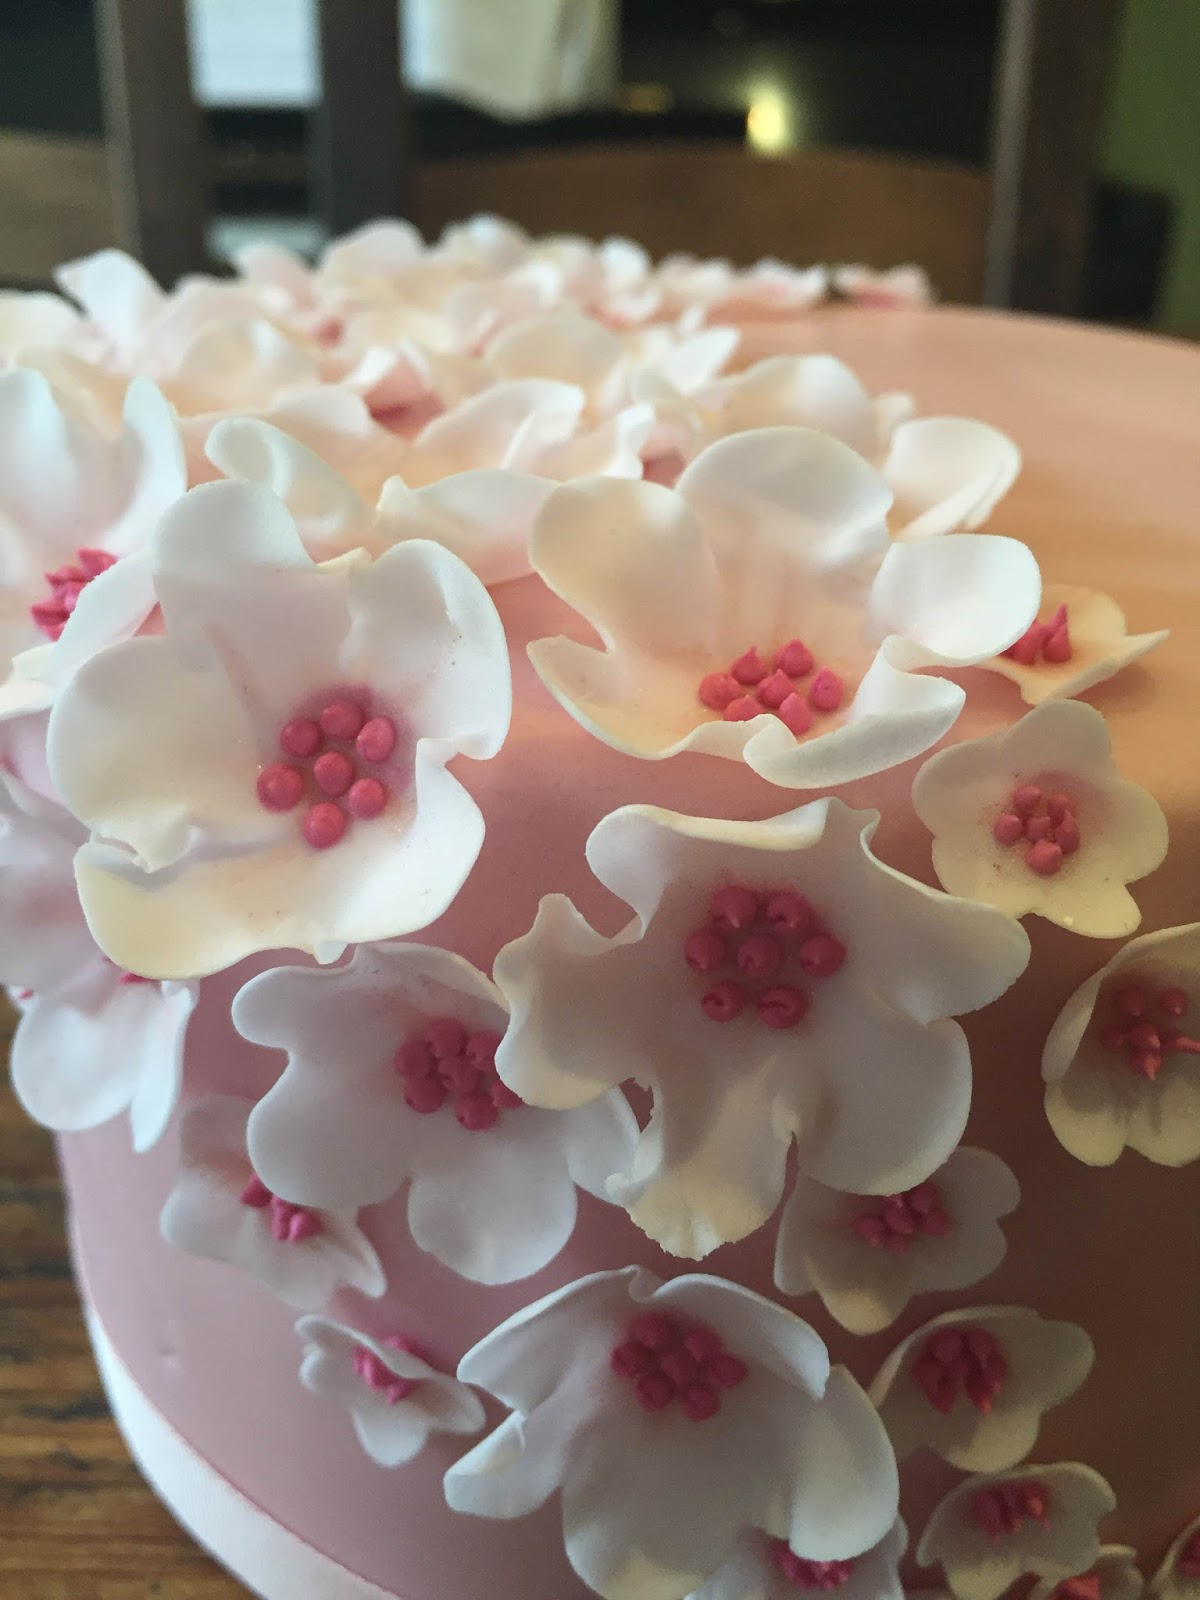
The petals are made from sugar florist paste. This is an icing with added gums that mean it can be worked very, very thinly. I first rolled the paste and used a blossom cutter to cut out the simple flower shape. I then placed the blossom on a cake decorating sponge and gently thinned further using a ball tool. The tool should be rubbed over the flower evenly until it is consistently very thin and almost see-through. Finally to really flute the edges I rubbed the tool with a fairly firm pressure just over the edge. I left the flowers to shape and dry in an an artists palette that had been dusted with corn flour to prevent it sticking.

Blossoms made from sugar florists pastes drying in an artists palletDusting sugar florist paste flowers

Once dry the next stage was to give the flowers a light dusting in the centre with some dusting powder. I used a tiny brush and a small drop of claret dust which I'd lightened with some white dust for a more subtle finish.

I then made and coloured pink some royal icing which I added to a small piping bag with a tiny 'no 1' piping nozzle. I piped tiny dots of royal icing in the centre for the stamen.

Handmade sugar cherry blossom

I then piped a larger dot to the back of each flower and used that to attach the flowers to the cake. 


Sunday, 17 May 2015

Alexander's Christening Cake


This cake was a christening gift for our friends' baby Alexander. His mum had asked for a two tier blue and white cake with rocking horses, bunting and baby blocks with his name. 

I considered making a 5" and a 7" tier but that didn't seem substantial enough for the big party so I settled on a 6" and 8" tier for a truly massive cake. This is the first two tier cake that I've made since we bought a new stove. It seemed a great opportunity to try out the side oven, in which, I'd been assured by the salesperson, I could bake four tiers at the same time and they'd all cook evenly. This oven had only been used for cooking many frozen pizzas so I was certainly pleased to put it to a more worthy use. In this case I'm pleased to say that the salesperson was correct! They look a bit sunken in the picture below but I think that was more to do with me shaping the batter in this way before they were baked.

I followed all the usual processes for making each tier as I've mentioned before; slicing, layering with buttercream and jam, covering with buttercream then marzipan and then sugarpaste icing.

The letters and rocking horses are cut from a modelling paste made of sugarpaste and CMC. If there's a way to use the cutters to cleanly cut out pieces such as these then I do not know it! This time I've found that the easiest way to use them without distorting the letters is to cut each letter but not remove them from the surplus icing until they have been left to dry overnight. I then needed to use a scalpel to carefully neaten up the edges; a time consuming but ultimately rewarding task.


I fashioned a template for the bunting swathes from a piece of greaseproof paper and used a scalpel to etch a line onto which I could glue the bunting triangles and pipe the rope. I haven't practiced piping royal icing in over a year and it does show, but I'm reasonably satisfied with the overall result.

The rocking horse on top of the cake is made from two cutouts glued together only in the top half. The bottom halves were then held apart as the model dried. Finally I added a saddle made of modelling paste and piped eyes, a mane and tail.


Sunday, 30 March 2014

A cake decorating lesson

Two of my girlfriends came around today for a cake decorating lesson. We had great fun and I was really pleased with how well their icing and decorations turned out. I said I'd write down some key points and recipes for them which I may as well share with you all. All quantities for a 6"/15cm round cake.

Elephant cake

As am aside here's a picture of the first cake decoration I tried to do before I went to learn properly at night school! I'm very proud of it for a first attempt. The model comes from The Essential Guide to Cake Decorating.


Sponge cake

200g salted butter at room temperature
200g caster sugar
4 medium eggs
200g self-raising flour
1 tsp baking powder
1 capful of vanilla extract
30ml milk

  • Preheat the oven to 180 degrees C
  • Grease the baking tin and sprinkle with a fine dusting of flour so the cake doesn't stick
  • Cream the butter and sugar together with an electric mixer for at least five minutes until they become almost white. It really helps to cream up faster if the butter is softened
  • Crack the eggs into another bowl and slowly add to the mix, add a little flour to stop the batter curdling
  • Add the rest of the flour and baking powder and mix. This is best done by hand so as not to overwork.
  • Add the vanilla extract for flavour and milk to loosen the consistency.
  • Split evenly between two identical tins. Spread the mixture higher around the edges so that when the cakes rise they stay as flat as possible; you want the batter to be visibly concave.
  • Baking time depends on size of tin, oven temperature etc. When cooked the cake should start to smell caramelised and when poked should feel soft and springy to touch without leaving an indentation. A skewer should come out clean.

  • Leave to cool for a few minutes but whilst still warn prick all over with a skewer and using a pastry brush liberally apply syrup.
  • Once cooled wrap in cling film and leave to rest overnight to firm up so that they are easier to slice.
  • This quantity makes around a 4" tall cake.

Stock syrup

Stock syrup is made from 50% sugar, 50% water by volume. It helps to keep a sponge cake really moist, given it takes a day or two from baking to decorating to actually getting to eat the cake! I use around 1/3rd cup of each for a 6"/15cm cake. Add the water and sugar to a pan and bring to the boil. When the sugar has dissolved remove from the heat and add a capful of vanilla extract for flavour. Leave to cool.


Buttercream

100g salted butter at room temperature
100g icing sugar

  • Mix together using an electric mixer for at least five minutes until the icing becomes almost white.


Marzipan and Sugarpaste

600g marzipan
600g sugarpaste for the cake
200g sugarpaste for the board

It really helps to be generous with quantities of marzipan and sugarpaste so always tend towards using too much rather than too little.


Covering the board


  • Cover the board with a layer of icing a day or two in advance to give the icing time to dry.
  • Before you roll out the icing brush the board with cooled boiled water or vodka so that the icing sticks. Be very very sparing with the icing sugar or it'll dry out the icing and leave visible marks.
  • Use a cake drum style board that is at least 3" bigger than the cake.

Decorating the cake

  • Use a cake slicer to level off the top of each cake and to slice each cake into two layers.
  • Use the bottom of one of the cakes as the bottom layer as it will have a harder and flatter base to help support the rest of the cake. 
  • Place the first layer onto a large square of baking parchment so you can easily lift and rotate the cake as you work. Smother generously with jam.
  • Place the second layer on top. Smother generously with butter cream.
  • Place the third layer on top. Smother generously with jam.
  • Place the top layer on top. It's best to use the other cake bottom upturned as the top layer as that too will be firm and flat.

  • Smother the whole four-layer cake with butter cream, filling any gaps. Use a pallette knife to remove the excess and ideally leave a fairly perfect cylinder of delicious, delicious cake.
  • Chill in the fridge for as long as you have time for. Ideally an hour or so.
  • Roll out the marzipan and carefully apply to the cake. When rolling our aim for around 5mm thick and a diameter that is at least as big as the diameter of the cake + 2 x the height of the cake. Each time you roll gently rotate the marzipan or icing by 90 degrees to help stop it sticking. 
  • Cut off the excess and polish with cake smoothers. 

  • Wash all your tools and the surface so you don't get the marzipan oils into your icing
  • Use a pastry brush to moisten the marzipan with either cooled boiled water or vodka.
  • Roll out the icing and carefully apply to the moistened marzipan.  Cut off the excess and polish with cake smoothers.

  • Carefully peel off the baking paper and place in the centre of the iced board. Finish with ribbon.


Adjusting for different sized cakes

7 inch round

  • Multiply basic sponge quantity by 1.5. 
  • 750g marzipan/sugarpaste +250g sugarpaste for the board

8 inch round

  • Multiply basic sponge quantity by 2.
  • 850g marzipan/sugarpaste + 350g sugarpaste for the board

Square/rectangular

At these sizes you can get away with using the same quantities for round and square cakes, but the square ones won't be quite as tall.

Sunday, 26 January 2014

Baby shower cake

Blue baby blocks cake for shower

I was very pleased to make a cake for a friend's baby shower this week. The brief was to make a blue cake to fit with a book and alphabet themed shower. Searching for book cakes returns loads of gorgeous examples but I was quite pushed for time this weekend so settled for something I knew I could do well and quickly. Often cakes as simple as this can be harder to make than the more complex designs as there is no way to hide any imperfections! I think the simplicity is very effective.

Even though this is a well rehearsed design I did learn something new whilst baking this cake; always crack your eggs into a bowl before you add them into the mix! After spending a good few minutes beating the butter and sugar together, the first egg that I cracked straight into the mix was clearly bad. I had no choice but to throw all the mix away and start again. At least it was the first egg and not the sixth! In future I'll be certain to crack them into a bowl or cup first.

I'd made the baby blocks before for Jessica's Christening Cake. They are made from sugar paste with added Tylo to stiffen them up. The letters are cut out from a very thinly rolled coloured version of the same paste. I recommend leaving the letters for a few minutes to dry and stiffen before trying to separate them. Use a cocktail stick to remove any excess icing and a sharp knife to lift them off the board.

This is the first time I've used my new 7" round tins that I bought for the Tiffany cake but didn't get to use. They made a really good sized cake for this part with about 12 people. Slices were generous and there was plenty of cake left over to take home to hungry husbands.

That's all there is to it!

Sunday, 5 January 2014

Tiffany Pearls Cake

Two tier Tiffany Pearls cake

I've been meaning to make this cake for ages but it's a complex one so I needed a really good reason to bake it. This week was my dear Mum's birthday so I thought it would be the perfect occasion.

The cake is based on this Peggy Porschen design from her Cake Chic book. Peggy's version is a Wedgewood blue but I've done it, more properly in my opinion, in Tiffany green by mixing some Holly Green and a touch of Navy food colouring into sugarpaste.

I wanted an impressive cake with a 7" and 5" tier but I couldn't find any 5" tins on my local high street. Any bigger would have been far too much cake for our small family party so I had to settle for 6" and 4" tiers.

Bottom tier cake with supports
A two-tier cake really needs support to stop the top-tier sinking into the bottom one. You can buy special supports for this but I already had some cake-pop sticks which I just cut down to the right height. The sticks are meant to sit about one millimetre above the top of the icing. The board for the top-tier should sit on the supports and not the cake below so as not to squash the cake and make sure the structure is stable.


I'm massively out of the habit of decorating with royal icing so I'm quite pleased with how well this has come out. I did a practice version completely free hand and learned that I just don't have the skills to do that! On the real cake, as recommended by Peggy, I scratched a straight line into the top tier and used that as a guide line. For the bottom tier I hand drew some swathes onto a piece of paper that I then traced onto the cake and used that as a guide line. After piping on the pearls I left them to dry and then painted then with edible lustre to give them the pretty pearlised sheen.


Friday, 3 January 2014

Nanna's Birthday Cake

Royal icing piped flowers cake


This is a cake I iced a few years ago for my Nanna's birthday. I was studying cake decorating at an evening class at the time and was keen to practice my skills with royal icing and this was certainly a big test! The design is from Peggy Porschen's Pretty Party Cakes book.

I made the flowers well in advance as they keep indefinitely. The pink flowers were the simplest to make. I used a petal nozzle to pipe a single petal onto the flower nail using a stiff peak royal icing, I then rotated the nail by 1/5th and piped another petal and so on. After the flower dried the yellow centres were then piped on top. The other flowers are all variations on the same theme. I particularly liked the violets which had two different colours of icing and used a black edible pen to accent the petals. After the cake was decorated the flowers were stuck down with more royal icing and pretty green leaves piped on randomly for added effect.

Royal icing piped flowers cake

Wednesday, 17 July 2013

A cake decorators toolkit


I'm often asked how I manage to achieve particular features of my cakes and my answer is invariably that there is a tool for the job! Here's my top items in my cake decorators toolkit:

1) Icing smoothers


Icing smoothers

I absolutely couldn't get by without these! They help hide a multitude of sins. After applying marzipan to the cake I use these to push the sponge into as regular shape as possible and you can actually be quite brutal at this stage to force the cake into a more even cube/cylinder. Then after applying the icing these are used to remove any lumps and bumps and literally polish to a really smooth finish.

2) Tylo (CMC) or Gum Tragacanth and icing glue


CMS, Gum Tragacanth and edible glue


Not strictly a tool but an invaluable part of my arsenal nonetheless. The addition of a small amount of either of these powdered gums will transform regular icing sugarpaste into something that will hold its shape when modelled, not get too sticky, and allow you to roll it extremely thinly. You can also buy ready mixed modelling paste but I really don't see the value when you can so easily make it yourself. 

Icing glue is simply a hydrated version of CMC and I use a fine brush to stick items together in most of my designs.


Sunday, 14 July 2013

Bunting cake

Bunting cake

Nothing says "summer party!" quite like bunting. Well except maybe Pimms. And a barbecue. But that still makes it the first, second, third most important part of a summer party so I thought it would be a fabulous theme for a cake I was baking for a family summer party this weekend.

Our young cousins from New Zealand were visiting the family and everyone would be getting together so I wanted to make something quite fun. It was also really important that I could easily transport the cake on the train from London up to Yorkshire - a squashed cake is soooo not a good look - so it had to be single tier without too many fragile components.

I'd already pinned this FABULOUS bunting cake on Pinterest so borrowed heavily from it for this design. I was a bit reluctant to make yet another pink cake but I already had this sensational spotty ribbon that really complemented the patterns and made pink the obvious choice.

There was actually a reasonable amount of maths involved in the design. I made sure the bunting tessellated so I could make it efficiently. It then follows a visually appealing sequence of colours (blue, purple, green, blue...) and designs (spots, stripes, spots...) 

Making sugarpaste bunting

The bunting itself is, as always for me, make with regular supermarket sugarpaste with added Tylo powder that allows you to manipulate it really easily - in this case giving the ability to roll is extremely thinly. It was then simply stuck to the cake with edible glue.

Making sugarpaste bunting

After I got to the party I added the hanging string of bunting. To make this I had stuck triangles together with some paper coated sugar floristry wire between. It was then hung between a couple of cake pop sticks.

Layers of cake


Sunday, 19 May 2013

Mr Bump

Mr bump cake
I've been wanting to make a this cake for a while so when a slightly accident prone friend, with a thing for Mr Bump celebrated his birthday I jumped at the chance to give it a go!


At its heart this is a simple 6" sponge cake but the difficult part was making the limbs which were carved out of another cake. The trick was to chill the cake down to make it more solid before carving. I then added a layer of butter cream and chilled again.


When the limbs were properly solid then covering the limbs with marzipan and sugarpaste was quite straightforward.

Just to prove there really was cake inside!
The bandages were made from sugarpaste with added CMC to allow the paste to be rolled really thin for this nice layered effect. 

I'm quite proud of this cake. It was quite tasty too - even if I do say so myself!

Sunday, 10 March 2013

The music man

Piano and piano cake
Can you keep a secret? Sssshh. Come closer and I'll tell you; the Wee Greenwich Bakery isn't in Greenwich anymore! 

Much as we loved our wee Greenwich flat we had outgrown it and longed for outside space and more room to keep all our cookbooks and cake tins. Mr. M wanted a piano and a vegetable garden and I wanted a rabbit so we moved out of London and into a little house last year.

Well this week Mr. M finally got his piano. It was partially a birthday present and partially paid for with some kind wedding present money that we'd set aside for something really special.

To celebrate the occasion I also baked him a piano themed birthday cake. It was all a bit of a rush - I had about three hours after getting home from work to bake and ice the cake from scratch for Stuart to take to work the next day. This certainly isn't my best decoration ever but not bad for an evening's work! The cake was much appreciated and was apparently very delicious :)

Piano cake